
Introduction
Decks are one of the best ways to enjoy the outdoors here in Canyon Lake, Texas. Whether it’s watching sunsets over the lake or firing up the grill on weekends, a well-built deck expands your home’s usable space and increases its value. However, many homeowners are shocked to find their new deck deteriorating in just a few short years.
At DMH Development Corporation, we’ve seen it all. And frankly, most of the time it’s not just wear and tear — it’s the result of avoidable mistakes. If you’re hiring a deck contractor in Canyon Lake Texas, this guide is your essential checklist to ensure you get a durable, long-lasting deck that’s sturdy and stable for decades.
The Real Cost of Using $10 Pier Blocks
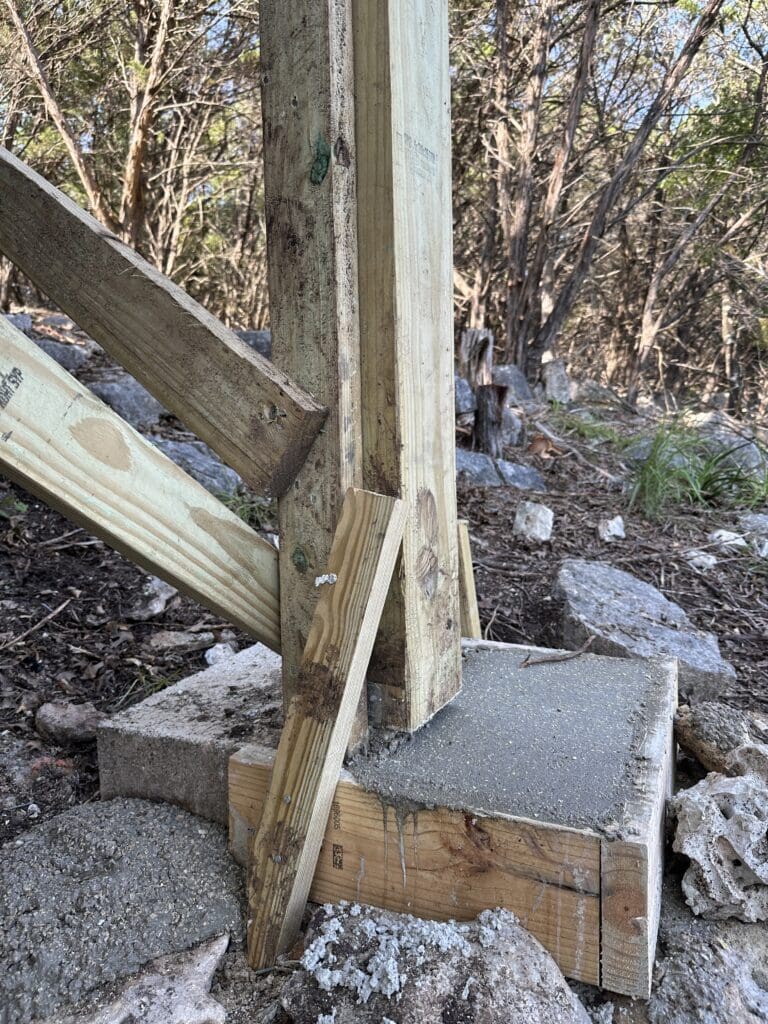
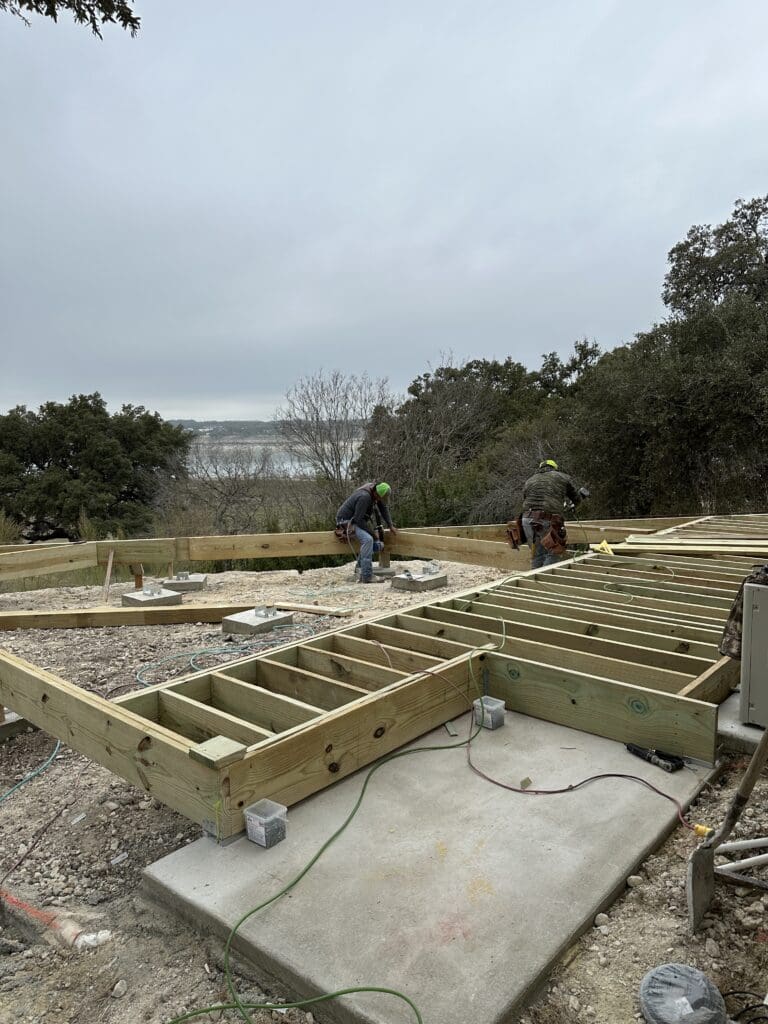
🚫 Non-hand Poured Concrete Pier Blocks- Using those tempting $10 pier blocks from big-box stores might seem like a smart budget move — until your deck starts wobbling.
Everyone loves these and I see these used all the time. On very short decks about 3 or 4 feet high, maybe, but even then, we suggest staying clear of these supposed cost saving options.
The pier anchors your deck to the ground. These piers get wobbled around over time from walking around on the deck and surface water from rain and run off loosen the earth around and under these piers. Once there is movement on a pier, your posts get stressed, twist, and bend. Now your whole sub-deck is shifting!
Those budget pier blocks sit on the soil and shift over time due to weather, movement, and erosion. Once one shifts, the whole substructure follows. Our recommendation- hand pour your piers. Below are a few examples of what that looks like.
Better Alternative:
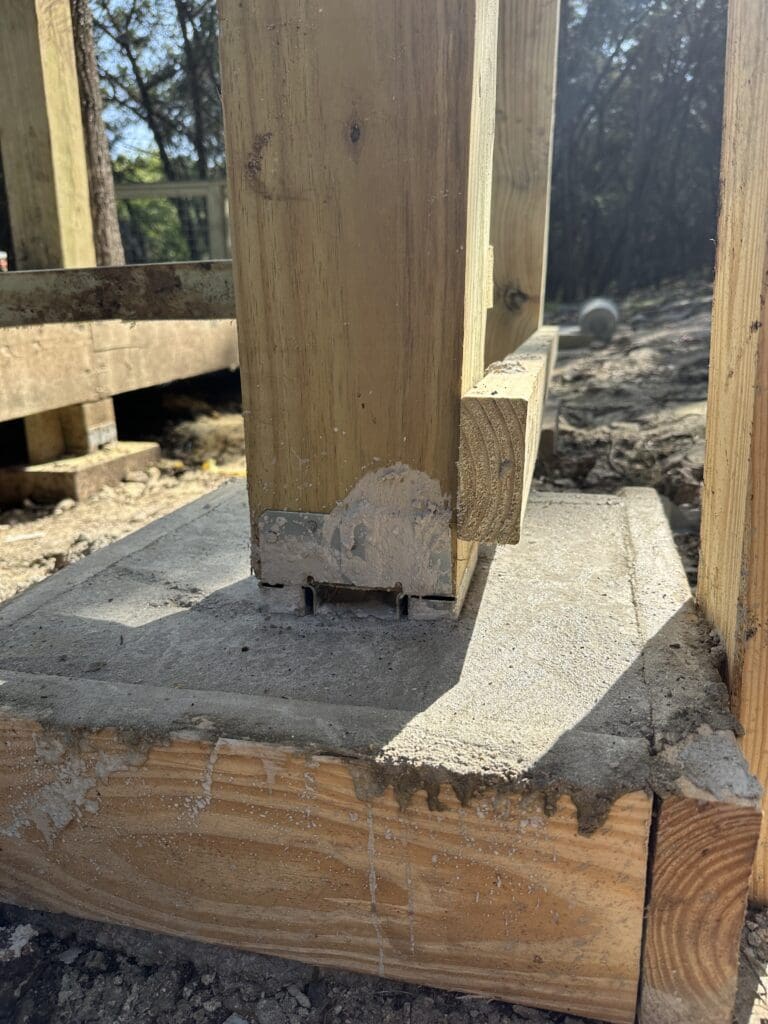
Hand-poured 18″x18″x18″ hole with rebar drilled and hammered into the earth with four rebar cross members using tie wire. Then pour 3 or so bags of 80lbs quikrete concrete into each pier. Give piers a couple days to cure so concrete is hard enough for an anchor bolt. Then, after deck layout is determined, anchor bolt Simpson standoff post base to each concrete pier. Now you have a solid pier anchored to the earth.
It costs about $60 per pier, but it ensures decades of stability. For a deck with 16 piers, that’s a $960 investment in peace of mind.
Pro Insight:
If your contractor uses poured piers, you’ve already gained hundreds in structural value before framing even begins, and the life of your deck is increased over several seasons and the Texas elements.
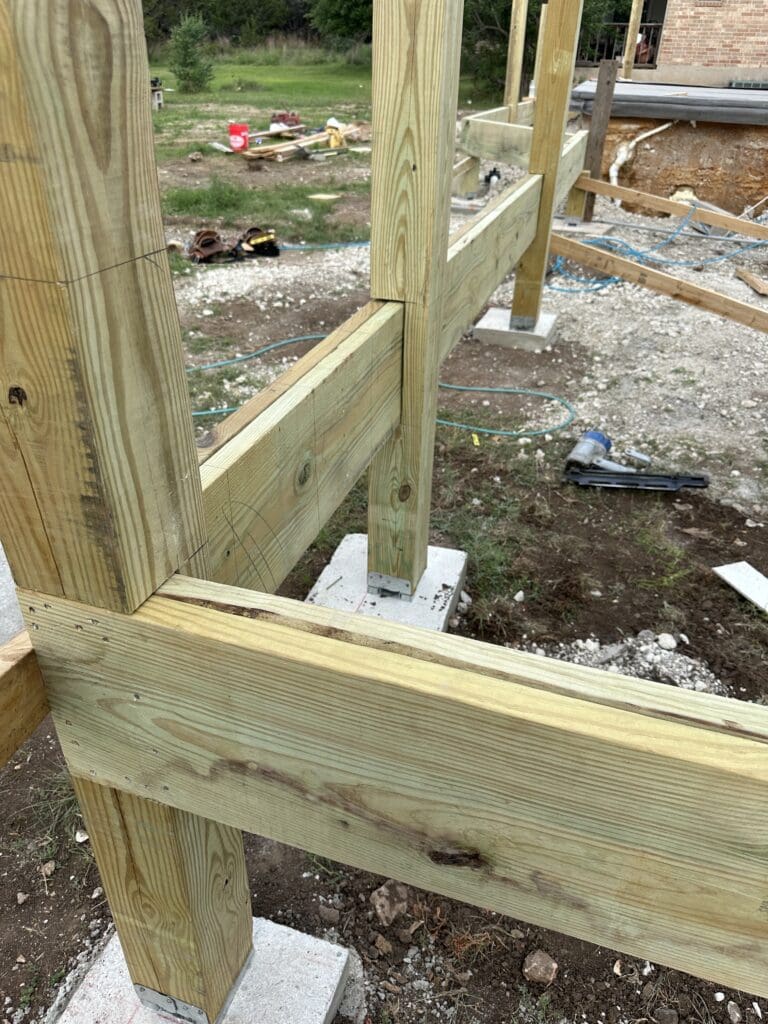
The Pitfalls of 4×4 Deck Posts
🚫 4×4 Deck Posts- Everyone and I mean everyone, loves 4”x4” posts. We have seen 4”x4” posts extending 16 feet in the air to meet the deck subfloor. The problem with that is 4”x4” posts are too narrow and twist and fatigue very quickly in the elements. We never buy a single 4”x4” for any of our jobs because we care about the structural integrity of our decks and safety of our customers. Stay clear of 4”x4”s and if your contractor insists and he always does it that way, you’ have ‘ll have a short lifespan deck build on your hands. In 1 to 3 years, you will be rebuilding something on your deck.
Despite being a common sight, 4″x4″ posts are just too flimsy for the Texas sun and high decks. They warp, twist, and fail early. This isn’t just aesthetic — it’s a safety issue.
Our Standard at DMH:
We never use 4″x4″. Only 6″x6″ pressure-treated ground contact posts make it into our builds. These posts offer 225% more surface area with unbeatable strength.
Homeowner Script:
If your contractor resists upgrading, just tell them “Tom and Dillon at DMH don’t allow 4x4s on their job sites” and send them to our Instagram. 😉
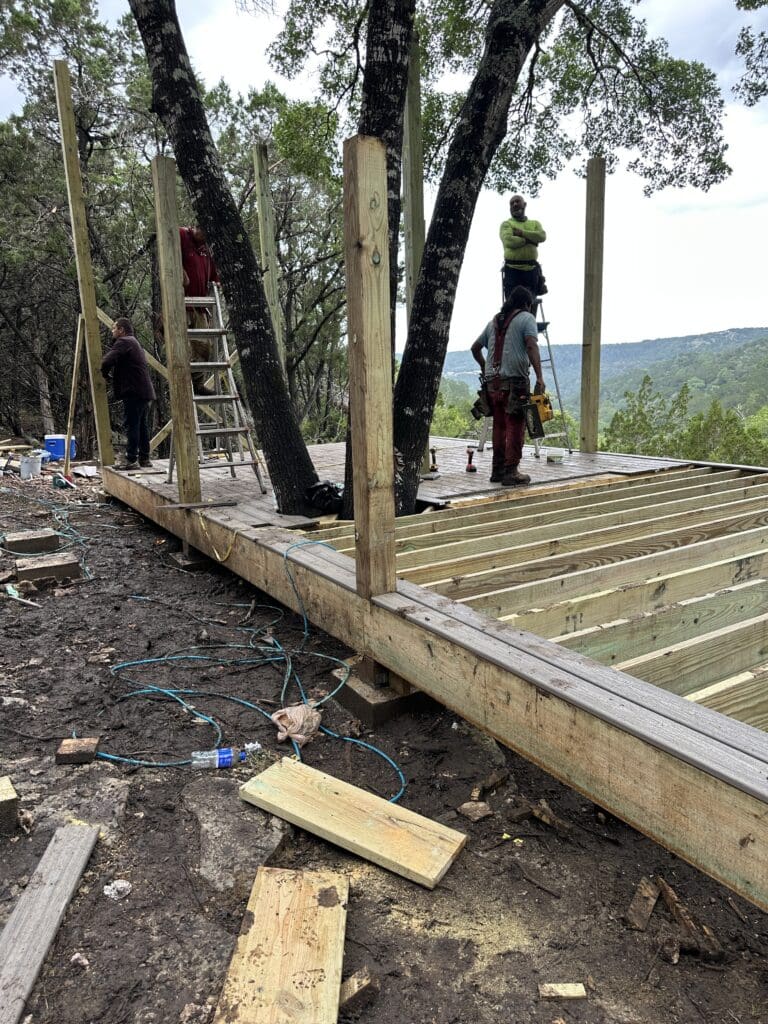
Weak Framing = Weak Deck
🚫 Weak Framing- Many decks are framed with single 2x12s — especially on larger spans. This shortcut significantly reduces load-bearing capacity and invites failure when adding second stories, pergolas, or hot tubs.
Decks that are larger than 12’x 12’ should be perimeter framed all the way around with double/sandwiched 2”x12.” On larger decks and decks with second story features such as another deck, a roof, or pergola, you might need triple 2”x 12” ‘s on two parallel sides. Keep in mind, double or triple boards is off the table if you use 4”x4” posts because it is only 4” and the post cannot be notched out to accommodate the double boards.
🚨 So a gentle reminder, if you got this far with concrete $10 blocks for your piers and 4”x4” posts, these two errors just mean you are now compounding weaknesses each next step of the way 🚨
Correcting A Problem Before It Happens:
On one deck job, we stopped by to check on the framing crew and the sub deck was framed in. The lead guy approached and ask me what we wanted him to do with the left over 2”x12”s and I instructed him
that doubles go all the way around with a stiffening beam across the middle of sub-deck using triple 2”x12”. He proceeded to tell us how many years he had been building decks in the area without doing it this way. I said, we have probably been rebuilding your decks! He was initially offended and said fine, he would build as we instructed.
Sometimes, even the construction guys are used to doing a job a certain way, but at team DMH, we do not cut corners on quality craftsmanship or anything that will because a safety concern for our clients.
What We Do Differently:
We double or even triple 2″x12″ perimeter beams for stiffness and long-term durability. This is non-negotiable. And remember, you can’t notch double 2″x12″s into a 4″x4″ — yet another reason to go with 6″x6″ posts.
Joist Size and Spacing Matter More Than You Think
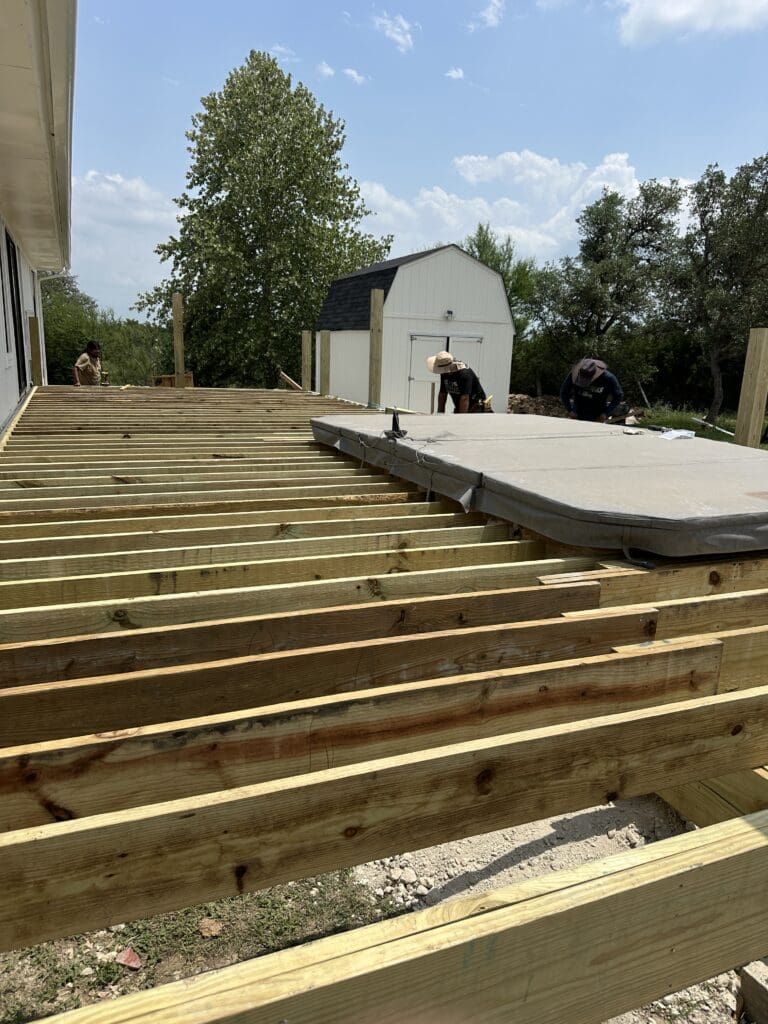
🚫 Basic Floor Joists- everyone loves 2”x6” floor joists and if you hear about a contractor using 2”x4” floor joists, immediately thank him for his time and move on. Some decks are very close to the ground and there can be clearance issues, so in this case 2”x6”s floor joists might need to be used. But there’s another option to increase the lifespan and security of your deck, and that’s 2″x10″ joists with 12” on-center spacing. It costs more in lumber and labor, but it eliminates the flex — delivering a solid feel underfoot for decades.
Optimal Build Standard:
We strongly suggest only using 2”x10” floor joists because the rating for stiffness is so much higher. If you have sold your contractor on 2”x10” s even against his will, the next two questions are key:
- what about spacing?
- what about hangers?
Detailed Illustration:
Most decks are every 16 or 18 inches with floor joists, sometimes every 24″. We only build with spacing every 12”. It costs you a little more lumber, but for very good reason. It will take the wave and flexing out of your deck. It’s much stronger and stiffer if you go every 12 inches. With the floor joists ends on each side of your perimeter frame, hopefully with double 2”x12”, the joists are nailed and screwed in on both sides- creating a super sturdy frame. Then a joist hanger should be slid up under the 2”x10” and nailed and screwed into perimeter structure- even sturdier. Simpson hangers are $2 each, but since you have to do both sides you can end up with 100 of them, so $200 in costs. Insist on the hangers, even offer to buy how ever many you need out of your pocket. Over time the joists want to wiggle away from the perimeter and the hangers keep them snug in place and reduce potential to wiggle around.
Why We Use Joist Hangers Everywhere:
Using 2x4s or even 2x6s for floor joists just doesn’t cut it. Neither does spacing them 18” or 24” apart. Sagging decks, flexing boards, and fast wear are inevitable. These little metal brackets prevent joists from shifting, detaching, or warping. If a contractor says they’re not needed, they’re not the right contractor.
What To Look Out For When Hiring A Deck Contractor
A Recap of What We’ve Learned So Far:
🚨 Most contractors give you a description of work and price for work with payment schedule and time of completion. If you get close to choosing a contractor based upon price and chemistry, ask them to provide you a complete list of materials they will be buying for your job. Read the list carefully- if you see a bunch of concrete post blocks $10 each and quite a few 4”x4” s and 2”x6”s on the list, problems concerning longevity of your deck are coming. If you don’t see a single 2”x10” or 2”x12”, then unfortunately, you are getting your standard, run of the mill poor performing deck.
✅ In our proposals, we provide a comprehensive list of materials to our customers so you know how we are building your deck- no guess work.
✅ We include a Scope of Work with a step by step outline of how your deck is built, complete with exactly what materials go where.
✅ Because we value transparency and openness, we do this for every potential project to ensure everyone is on the same page about what it is like working with team DMH 👍 Contact Tom and Dillon here for your own custom proposal!

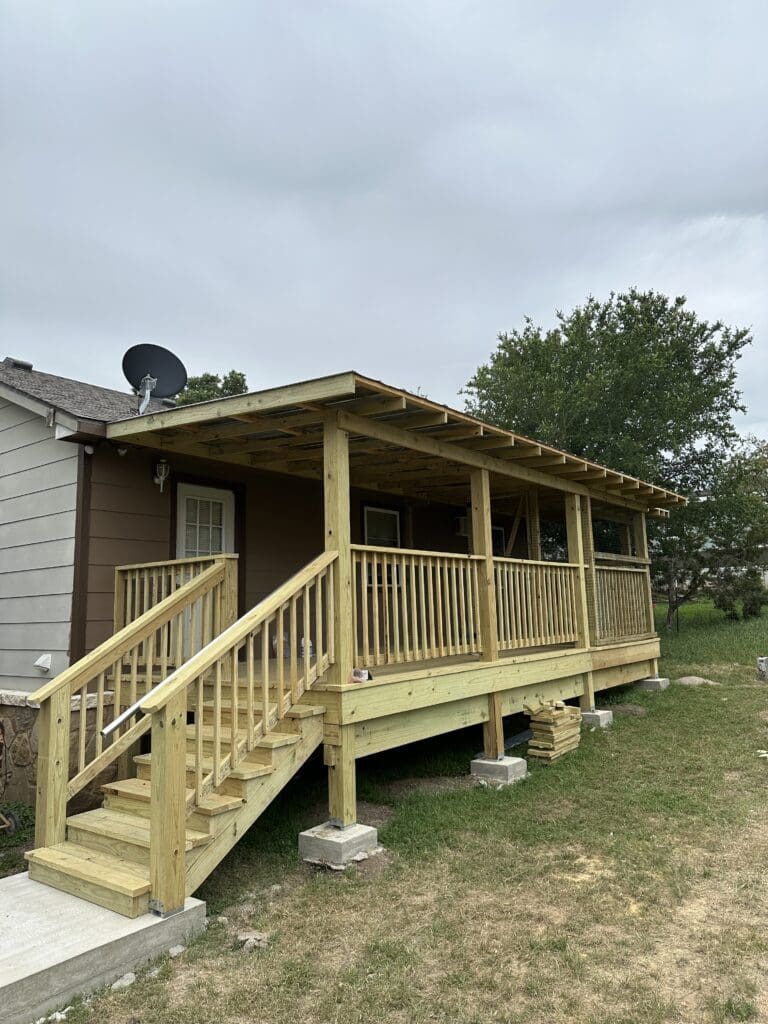
Ditch the Standard Deck Boards
🚫 Deck Boards- Home Depot and other hardware stores have “deck boards” 5/4”x 6” x 8’ and they come in 12’ and 16’ lengths. Unfortunately, these so called ‘deck boards’ only last 6 to 24 months 😬
Direct sun causes the corners and whole boards to twist and turn. Not only that, if your contractor used his air nail gun to install the boards, the nails get pushed up ever so slightly and can cause a serious foot gash.
At a minimum, screws should have been used. But let’s face it, if the contractor is cutting every corner up to now, why would he spend the extra money on deck screws and the time to drill each screw in individually?
Under all conditions, never use these 5/4” deck boards. They just don’t last. If you insist on real wood, then please use 2”x6” lumber screwed into sub-deck with NO NAILS- only screws.
Our Recommendation:
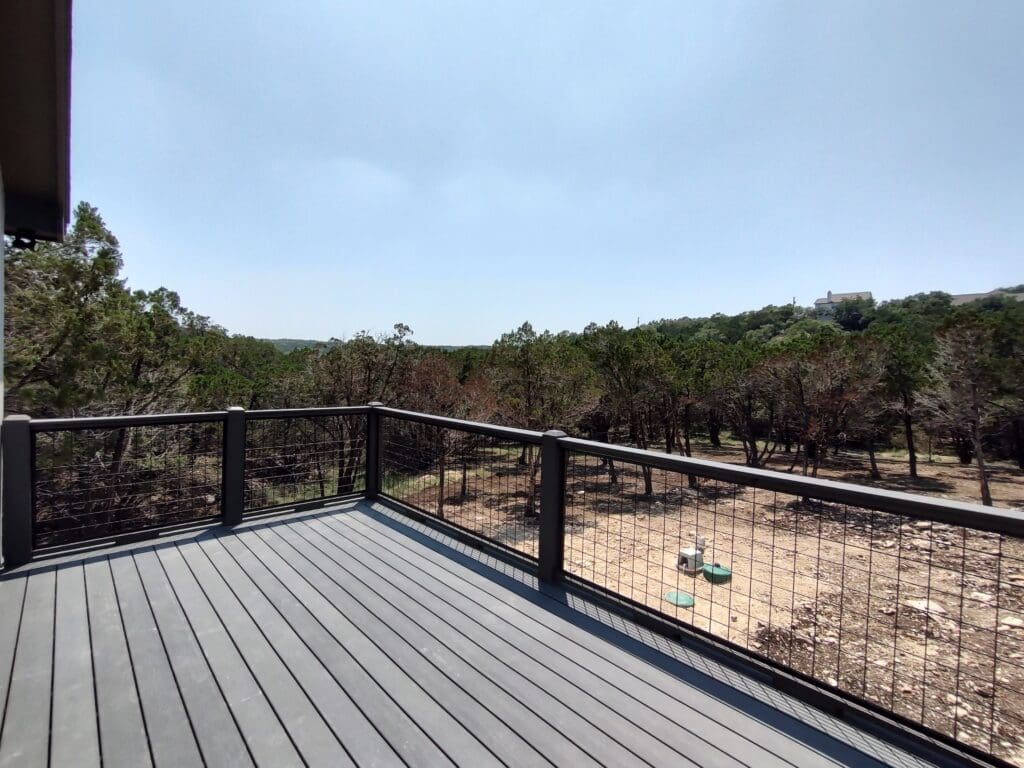
Trex or Trex competitors is the best way to go. A few decades ago when Trex first came out, we loved it but they were costly. Over the years with lumber prices increasing along with economies of scale for Trex factories, Trex is not that much more when looking at total cost of deck. When talking with customers on if they would consider Trex but are concerned about price, I always say, let’s bid Trex. Then we can review. If there are real cost constraints we will fine tune a new bid using 2”x6” lumber.
90% of time, customers go with Trex. Trex do not twist, turn, or buckle up at the corners. Trex do not fatigue in the sun. A couple times a year I just hose our Trex off to get rid of tree pollen and it looks like new 👍😎
Here are a few examples of Trex so you can vs lumber so you can see the difference:
Preferred Materials:
- Best: Trex or other high-quality composites
- Good: 2×6 pressure-treated wood (installed with screws, not nails)
Past Client Scenario:
A few years ago we did a very large deck rebuild on the side of a hill. We tore off the 25 year old deck boards and the joists were in good shape, but spaced 18 inches apart. I suggested we add one joist in between each one to get to 9” spacing. The owner said no way, 18” was fine for Trex. We we finished and
walked across these very long sections of the deck- you could feel “waves” when walking. We did not point this out because the owner was happy, but never again will we build a Trex deck for anyone without 12 inch spacing.
Recap:
Those budget “deck boards” from the hardware store rarely last beyond two years. Sun warps them. Rain rots them. And don’t get us started on air-nailed boards — they’re an accident waiting to happen. If you go with Trex, our preferred material for high quality and a clean look, insist on joists every 12 inches. Trex need a stiffer substructure to avoid that trampoline effect.
Stairs: Don’t Skimp On Your Stringers
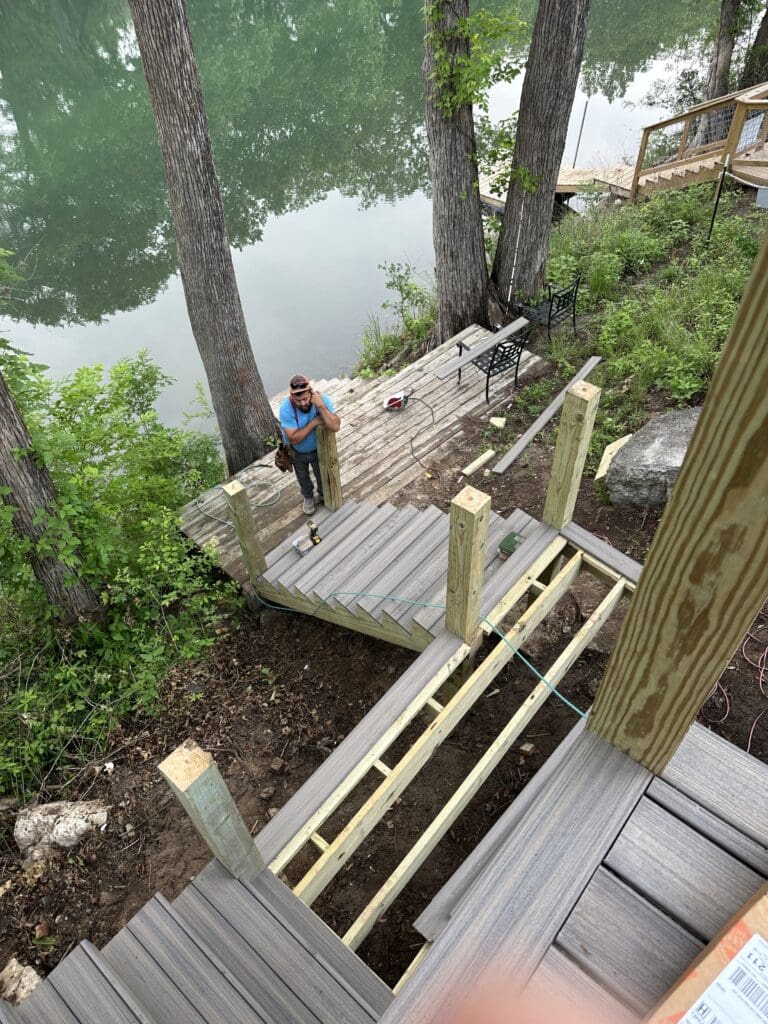
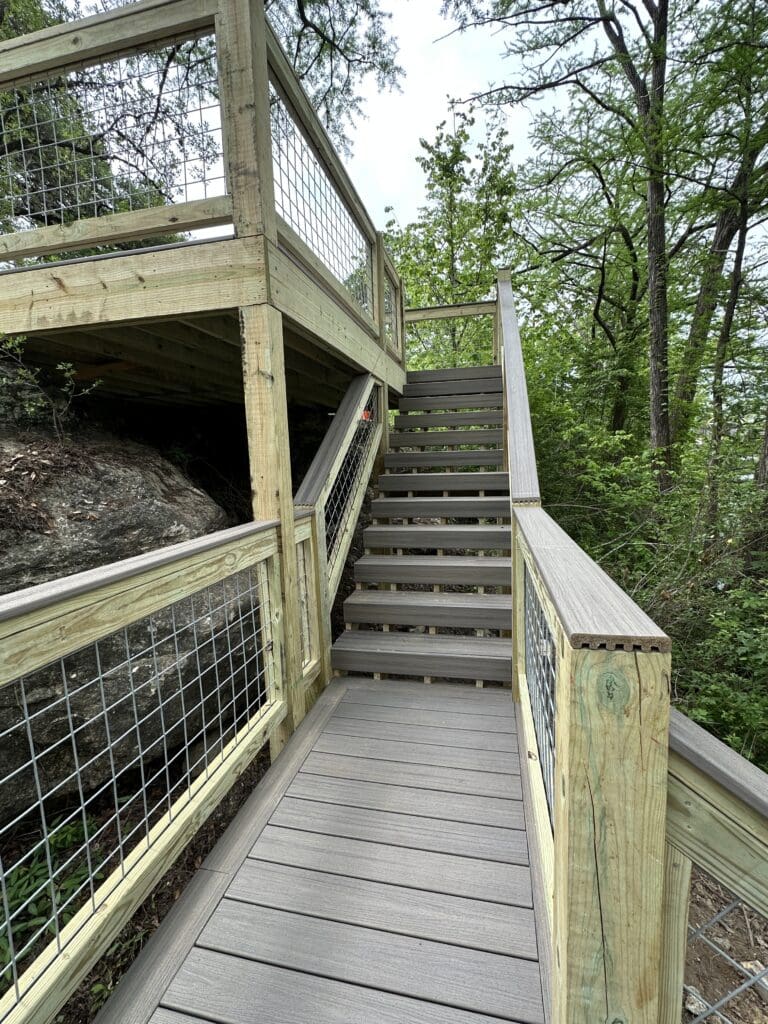
🚫 Uneven and Unsafe Stairs- Stringers are the vertical boards under your stair deck planks. Most contractors use only 3 stringers, and sometimes just 2. This leads to bounce, sag, and dangerous stairs. If your stairs are 4 feet or wider, you need 5 stringers — no exceptions.
If you get push back from your contractor, just say that is a deal breaker for you. The stringers keep your deck planks stiff. If the stringers are closer together, 12” apart, each stair is stiffer and getting more support. Stairs get the most wear and tear with people pounding their feet up the stairs and then bouncing down. It’s best just to give the stairs the support they need during the initial build.
Lastly, please don’t let your contractor set your stringers in the dirt. Earth to wood contact + water = decay of your stringers.
Another thing to lookout for- each stair should be exactly the same height around 7 1/2” high being optimal. Some stairs we have seen are 9” or 10” high. This sounds like a small difference but these stairs are extremely difficult to navigate for most people.
Important Tips:
- Opt for supported stairs with 5 stringers
- Treads should be equal height (approx. 7.5”)
- Stairs should land on a solid concrete pad, not dirt
Example of Stair Construction For Your Deck:
When considering your deck layout with your stairs, measure from the ground to your floor decking. Let’s say it is 5 feet or 60 inches. Each stair can descend 7.5 inches, so 60 inches high divided by 7.5” per stair = 8 stairs. Each stair has about 11 inches of surface area. So 8 stairs needs 88” of length to get to the bottom. That means to decline 5 feet, you need 7.33 linear feet to build your stairs. If you have the space, try to keep your stairs 4 feet wide.
Stair Landings: Make Sure You’ve Got One
🚫 Nonexistent Stair Landing- since we have 80lbs concrete sacks on site already for the concrete piers, we always have a concrete stair case landing, typically 5 feet wide and 4 long. This way, when you step off the last stair you are on a firm level area. I hate stepping on irregular sized rocks, lawn, rocky or sandy soil. The chances of slipping on your last step down are high. You need 20 sacks of 80lbs concrete and 4 sticks of rebar, typically $160 in materials to have a very clean safe landing.
Why A Stair Landing Makes A Difference For Your Deck:
The bonus is longevity for your stairs. I can’t tell you how many rotten stairs we see just sitting right on the wet, soggy dirt. Earth to wood contact with water results in rapid decay of your stairs.
The Truth About Railing Safety
🚫 Wobbly Railings- Your deck railing is the last line of defense against a fall, trip, or child running at full speed into it. It must be firm, immovable, and properly anchored. Unfortunately, many are wobbly at best and downright dangerous at worst.
Past Client Scenario:
One homeowner hired a handy man to install new boards on a rotten sub deck and rotten joists. I mentioned to the owner that she has dramatically increased her liability to the renters since the deck appears to have been repaired. The repairs she paid for just made it worse. She asked why she had more liability for fixing up the deck…without belaboring all the wrong deck railings we have seen, I showed her the far corner still had several holes in the floor and by gently pushing on the railing, it could be pushed off. The fall was 11 feet. The tenants had small grade school children having the time of their lives running all over the yard and the deck. A very precarious scenario.
Needless to say, we got the job to repair and rebuild her deck. The first thing we did was chainsaw the entire old deck off, along with a couple thousand dollars worth of new deck boards improperly and poorly installed on top of bad lumber. There was no way around re-laboring the entire deck build to make it structurally safe and sound for all tenants. The owner spared herself and her tenants potentially very nasty injuries and a costly lawsuit.
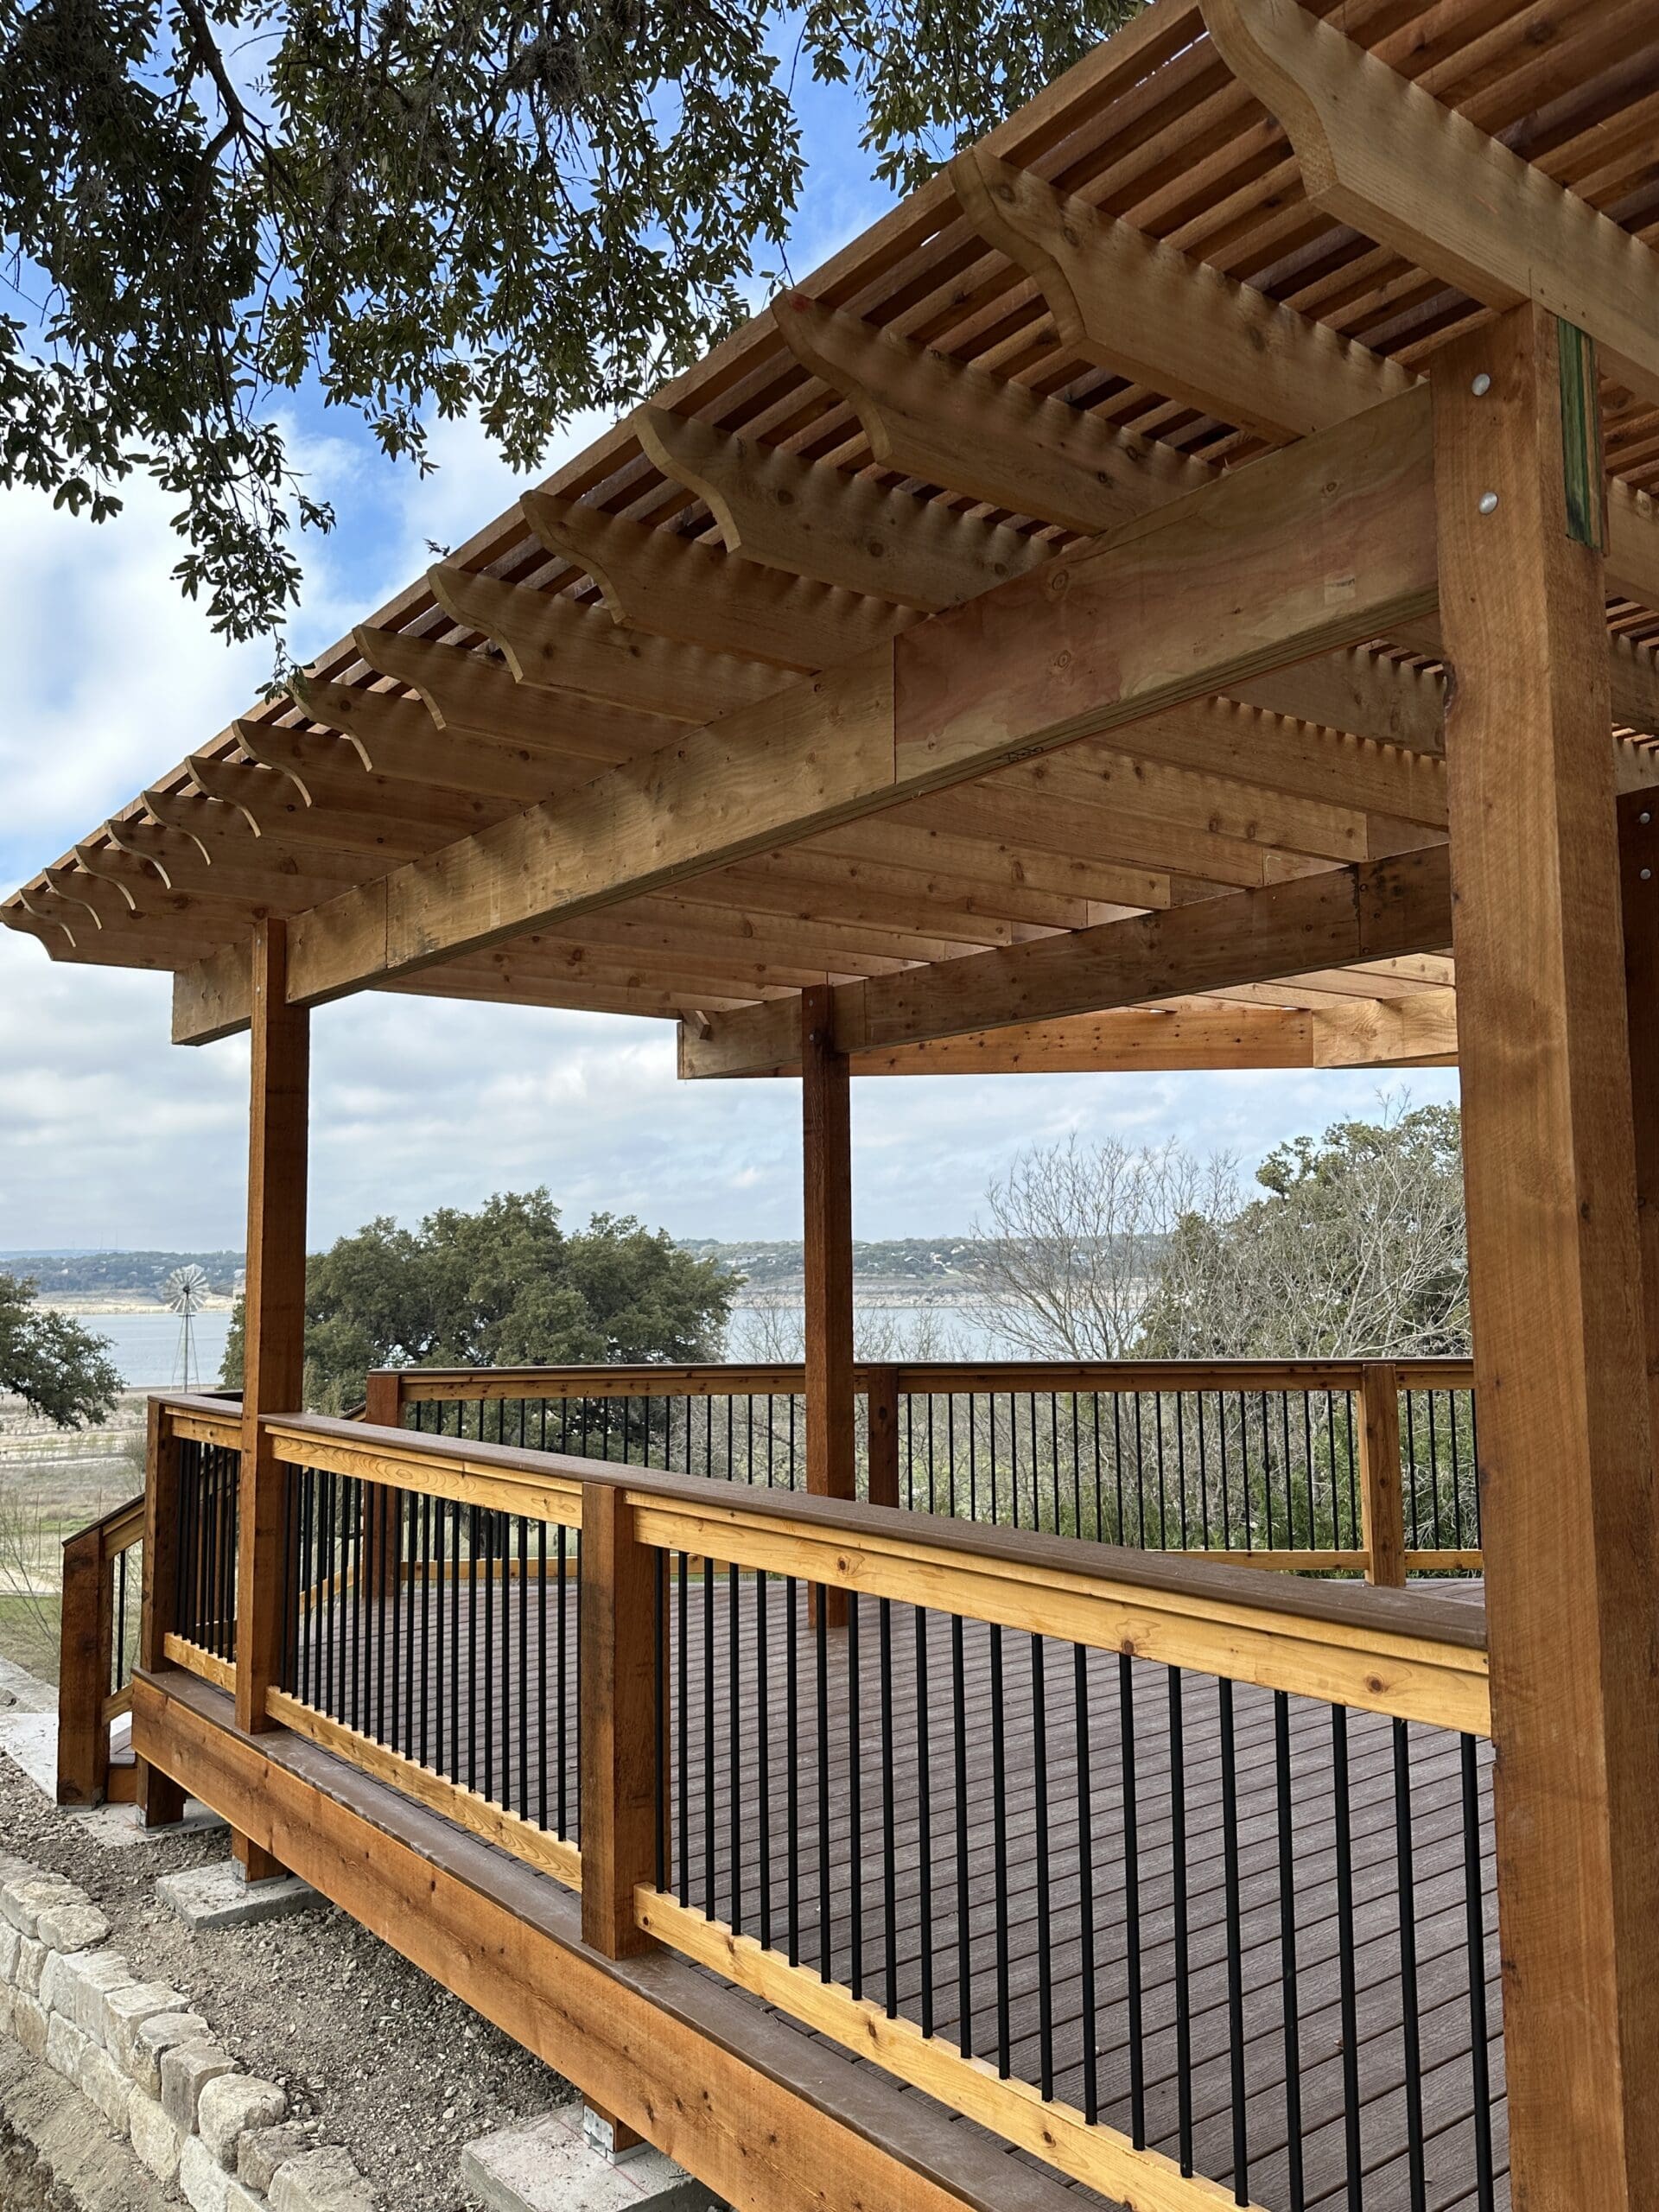
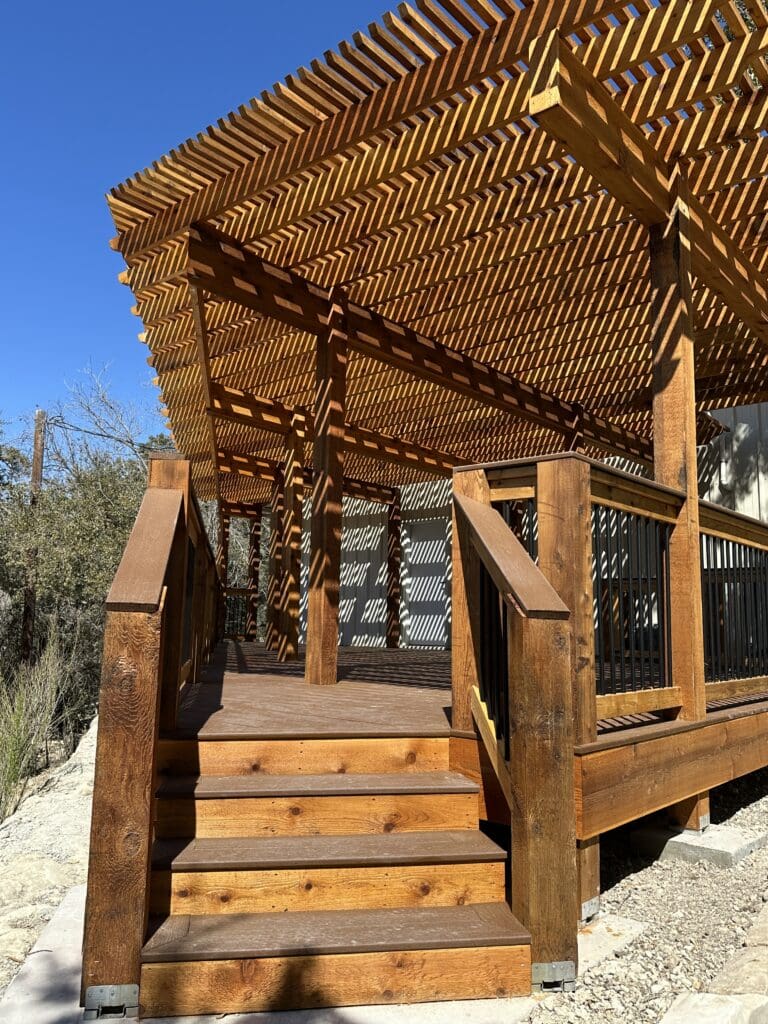
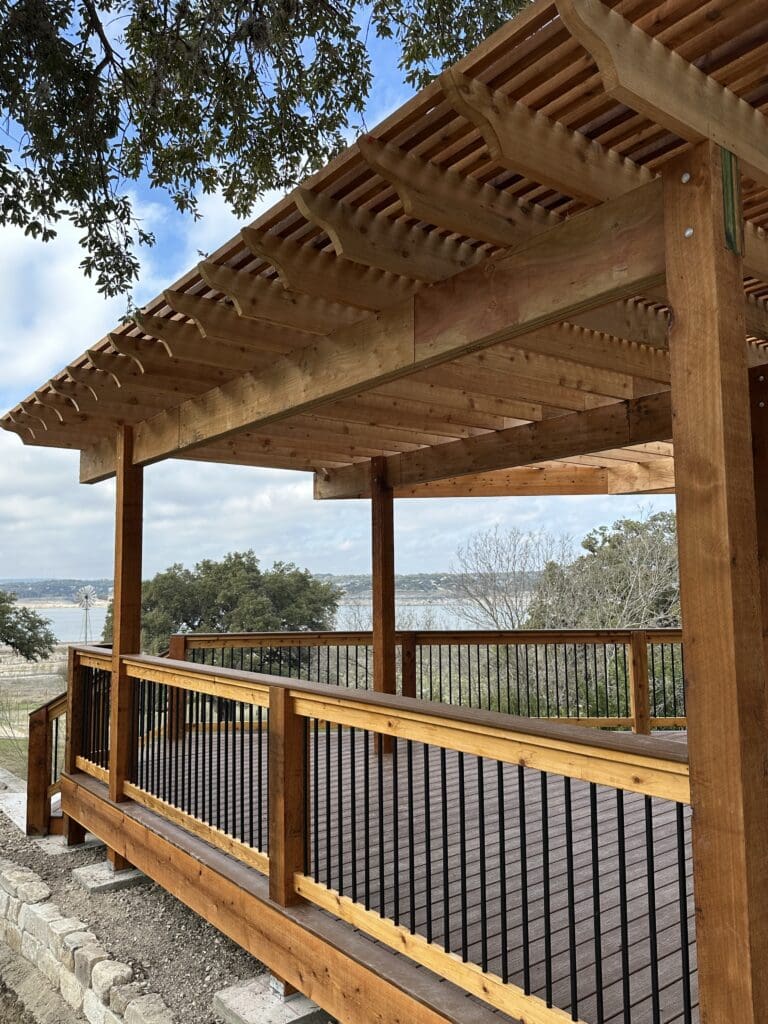
How We Build A Safe Deck Railing:
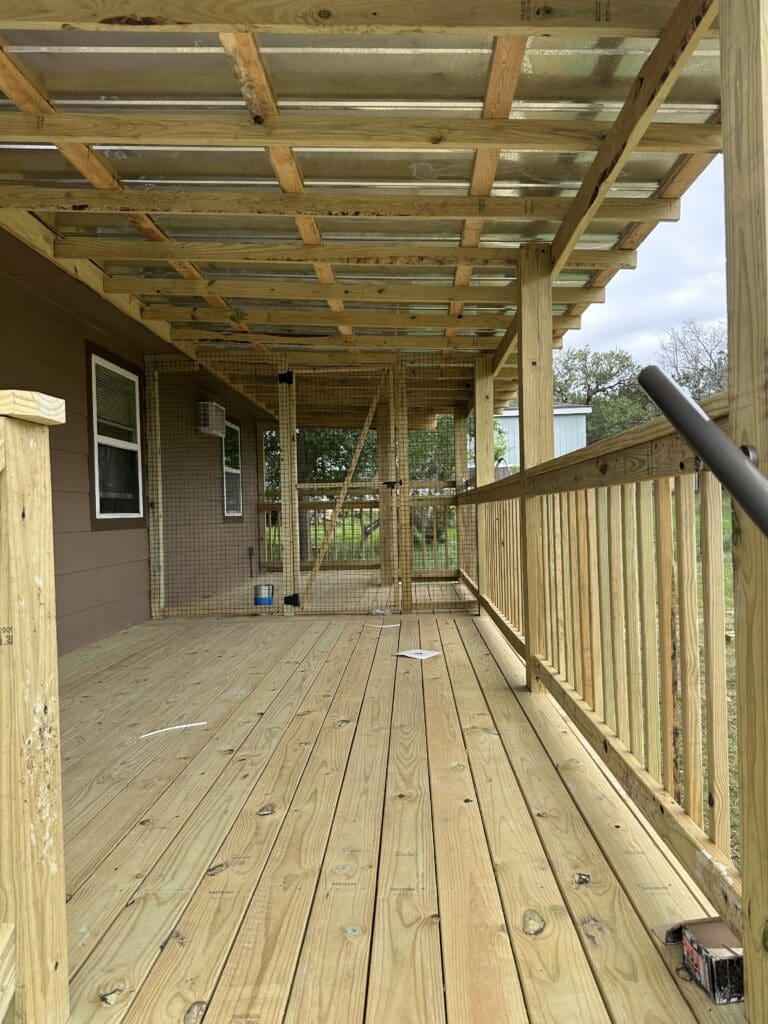
Generally, here is the best way to build safe deck railings. 6”x6” deck post rising above your deck to the 42” (safe railing height). The top board is a 2”x6” horizontal board running from one deck post to another. If you are stuck with 4”x4” posts, you will need to use a 2”x4” for the top board. Just under top board, use a vertical setting 2”x4” running horizontal anchored to each post. Then about 4” from bottom of deck, run another 2”x4”. Now the pickets can be installed. I like them 3” apart, but many times they are 4” apart. If hog wire is used instead, we like to staple hog wire from bottom and top on each wire to the 2”x4”.
We hate when contractors are in a rush and only staple every 6th wire. Why give the hog wire a chance to be pushed out by a fall or an aggressive yank? Another 2”x4” is attached on top and bottom to sandwich in the hog wire. Lastly, along each deck post on each side, a 2”x2” board is installed vertically to frame in the hog wire.
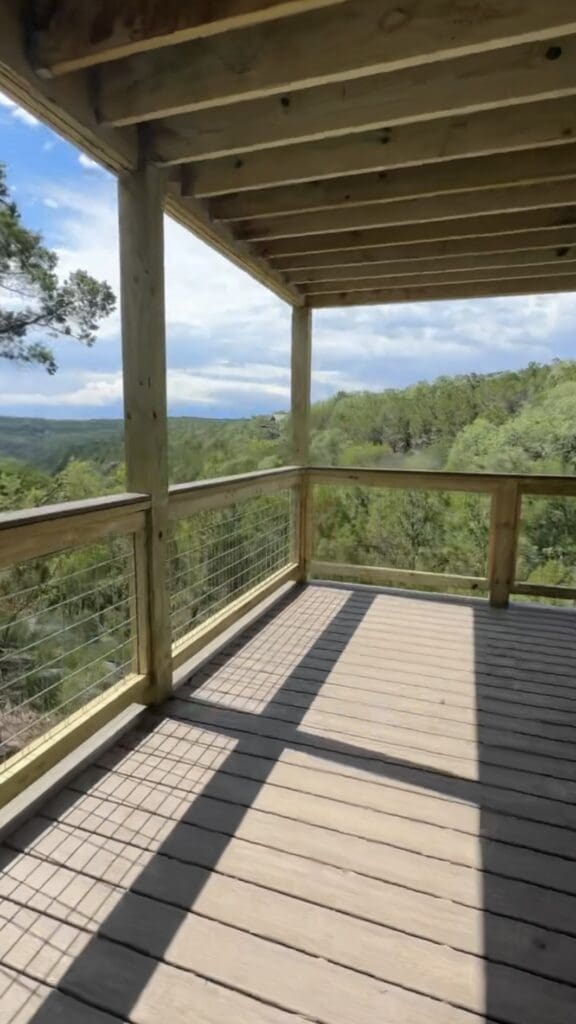
Perks of Hog Wire:
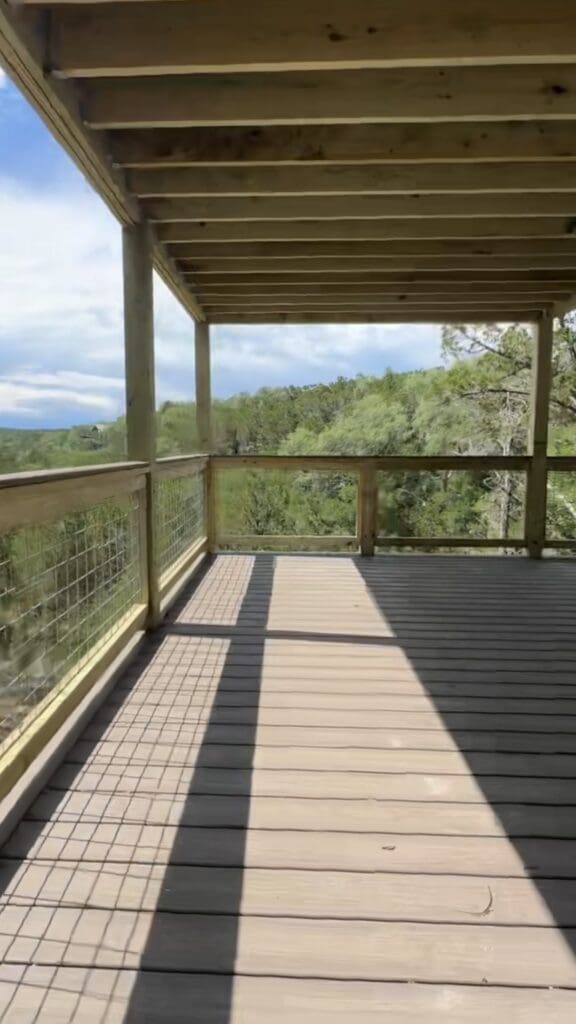
More and more decks are being build with hog wire. It opens up the deck view and over time, you don’t even notice the hog wire. If your deck is Trex, then a Trex board can be installed on top of the 2”x6” top board to add to the polished look and protect the wood from the sun.
Gauge Matters:
Hog wire thickness is rated by gauge. The lower the gauge number, the thicker the wire. For example, 6 gauge hog wire is much stronger than 12 gauge. Our recommendation- use 4-gauge hog wire for your railings. It’s twice as strong as the thinner stuff and worth every penny.
Our Rail Standard:
- 6×6 posts extended through the deck
- Top cap 2×6 rail with 2×4 mid and bottom rails
- 4 gauge hog wire to open up your deck and bring in beautiful hill country views
- Hog wire panels stapled securely and framed in with 2×2 trim
- Trex cap optional for a premium finish
Scope of Work & Material Lists: Ask for It
Before you choose your contractor, ask for a line-item material list. Look for red flags:
🚩 4x4s deck posts
🚩 5/4″ deck boards
🚩 Budget concrete pier blocks from big box stores
🚩 Floor joists longer than 12 inches a part
🚩 Limited stringers for your stairs
🚩 Uneven stair height and spacing
🚩 No stair landing
🚩 No mention of 2×10 or 2×12 lumber
🚩 Non Trex or untreated wood for deck
🚩 Wood contact with earth reacts poorly with water
🚩 Poorly anchored railings make wobbly, unstable rails
At DMH, we hand over a full scope of work and materials upfront. No guesswork. No surprises. Just transparency. Contact team DMH 😎👍
FAQs
What is the best type of foundation for a long-lasting deck?
Hand-poured concrete piers with rebar reinforcement provide the most stable and durable foundation for decks in Canyon Lake, TX.
Are 4×4 posts acceptable for deck construction?
Not in our book. 6×6 posts offer 225% more strength and resist twisting, which means a safer and longer-lasting structure.
How far apart should floor joists be for Trex decking?
Always space floor joists 12 inches apart for composite decking to prevent sagging and ensure a firm walking surface.
Why are deck railings often so wobbly?
Most contractors don’t anchor rail posts deep enough or use strong enough materials. We always build our railings to withstand strong impact safely.
Is Trex decking worth the extra cost?
Yes. It doesn’t warp, rot, or fade like wood. In the long run, it’s cheaper because it lasts longer and needs less maintenance.
What’s the typical lifespan of a professionally built deck in Canyon Lake?
With the right materials and construction, you can expect 20–30+ years — double or triple the lifespan of budget builds.
Conclusion
Building a deck might seem straightforward, but doing it right requires experience, quality materials, and attention to every detail. At DMH Development Corporation, we don’t cut corners. Our Canyon Lake neighbors deserve better — a deck they can trust for decades.
The DMH Deck Standard For High Quality Deck Builds:
✅ Hand poured rebar reinforced concrete piers with 240 lbs of concrete
✅ 6”x6” posts- Remember, 4”x4”is a deal breaker
✅ 2”x12”s and 2”x10”s must be on contractor material list to insure strong sub deck
✅ Floor joists 12” apart with Simpson joist hangers on each end
✅ Trex or similar composite is best! If not, 2”x6” pressure-treated wood only
✅ Even Stairs – 4 feet wide or wider must have 5 stringers
✅ Concrete landing for stairs- don’t set your lumber on the ground to rot away
✅ Safe railings- protect your friends and family and build the railing with high specifications. You should not be able to shake or wobble your railing. Even with aggressive and strong shaking. Railing should always be very firm and very stiff.
✅ 85% screws. If you don’t see a bunch of screws, have a talk with contractor.
I bet you did not know so much went into building a deck! The information can get very specific and overwhelming. If you have any questions or need some help with your deck design or rebuild, please feel free to call, message or email team DMH. Outdoor living is a very important part of families leisure time and enjoyment. Spending the time to insure a good deck build guarantee many, many years of deck life for your family 😎👍
Thinking of building or replacing your deck? Call us today for a free consultation. We’ll show you how we build decks that don’t just meet expectations — they outlast them.
Check Us Out Here:
- Services: Deck Building in Canyon Lake / Outdoor Living Projects
- Gallery: Recent Canyon Lake Deck Projects on Instagram
- About Us: Meet the DMH Team
Suggested Resources:
Be The First To Comment